Features overview

Design at twice the speed as we are constantly validating your model against applicable codes. Never worry about issuing avoidable code-violations again. When you create a project, choose the applicable codes that are relevant to your Project (NEC 2008/2014, ASHRAE 90.1, etc.). These codes are constantly being referenced to perform customizable auto-sizing calculations and validations.

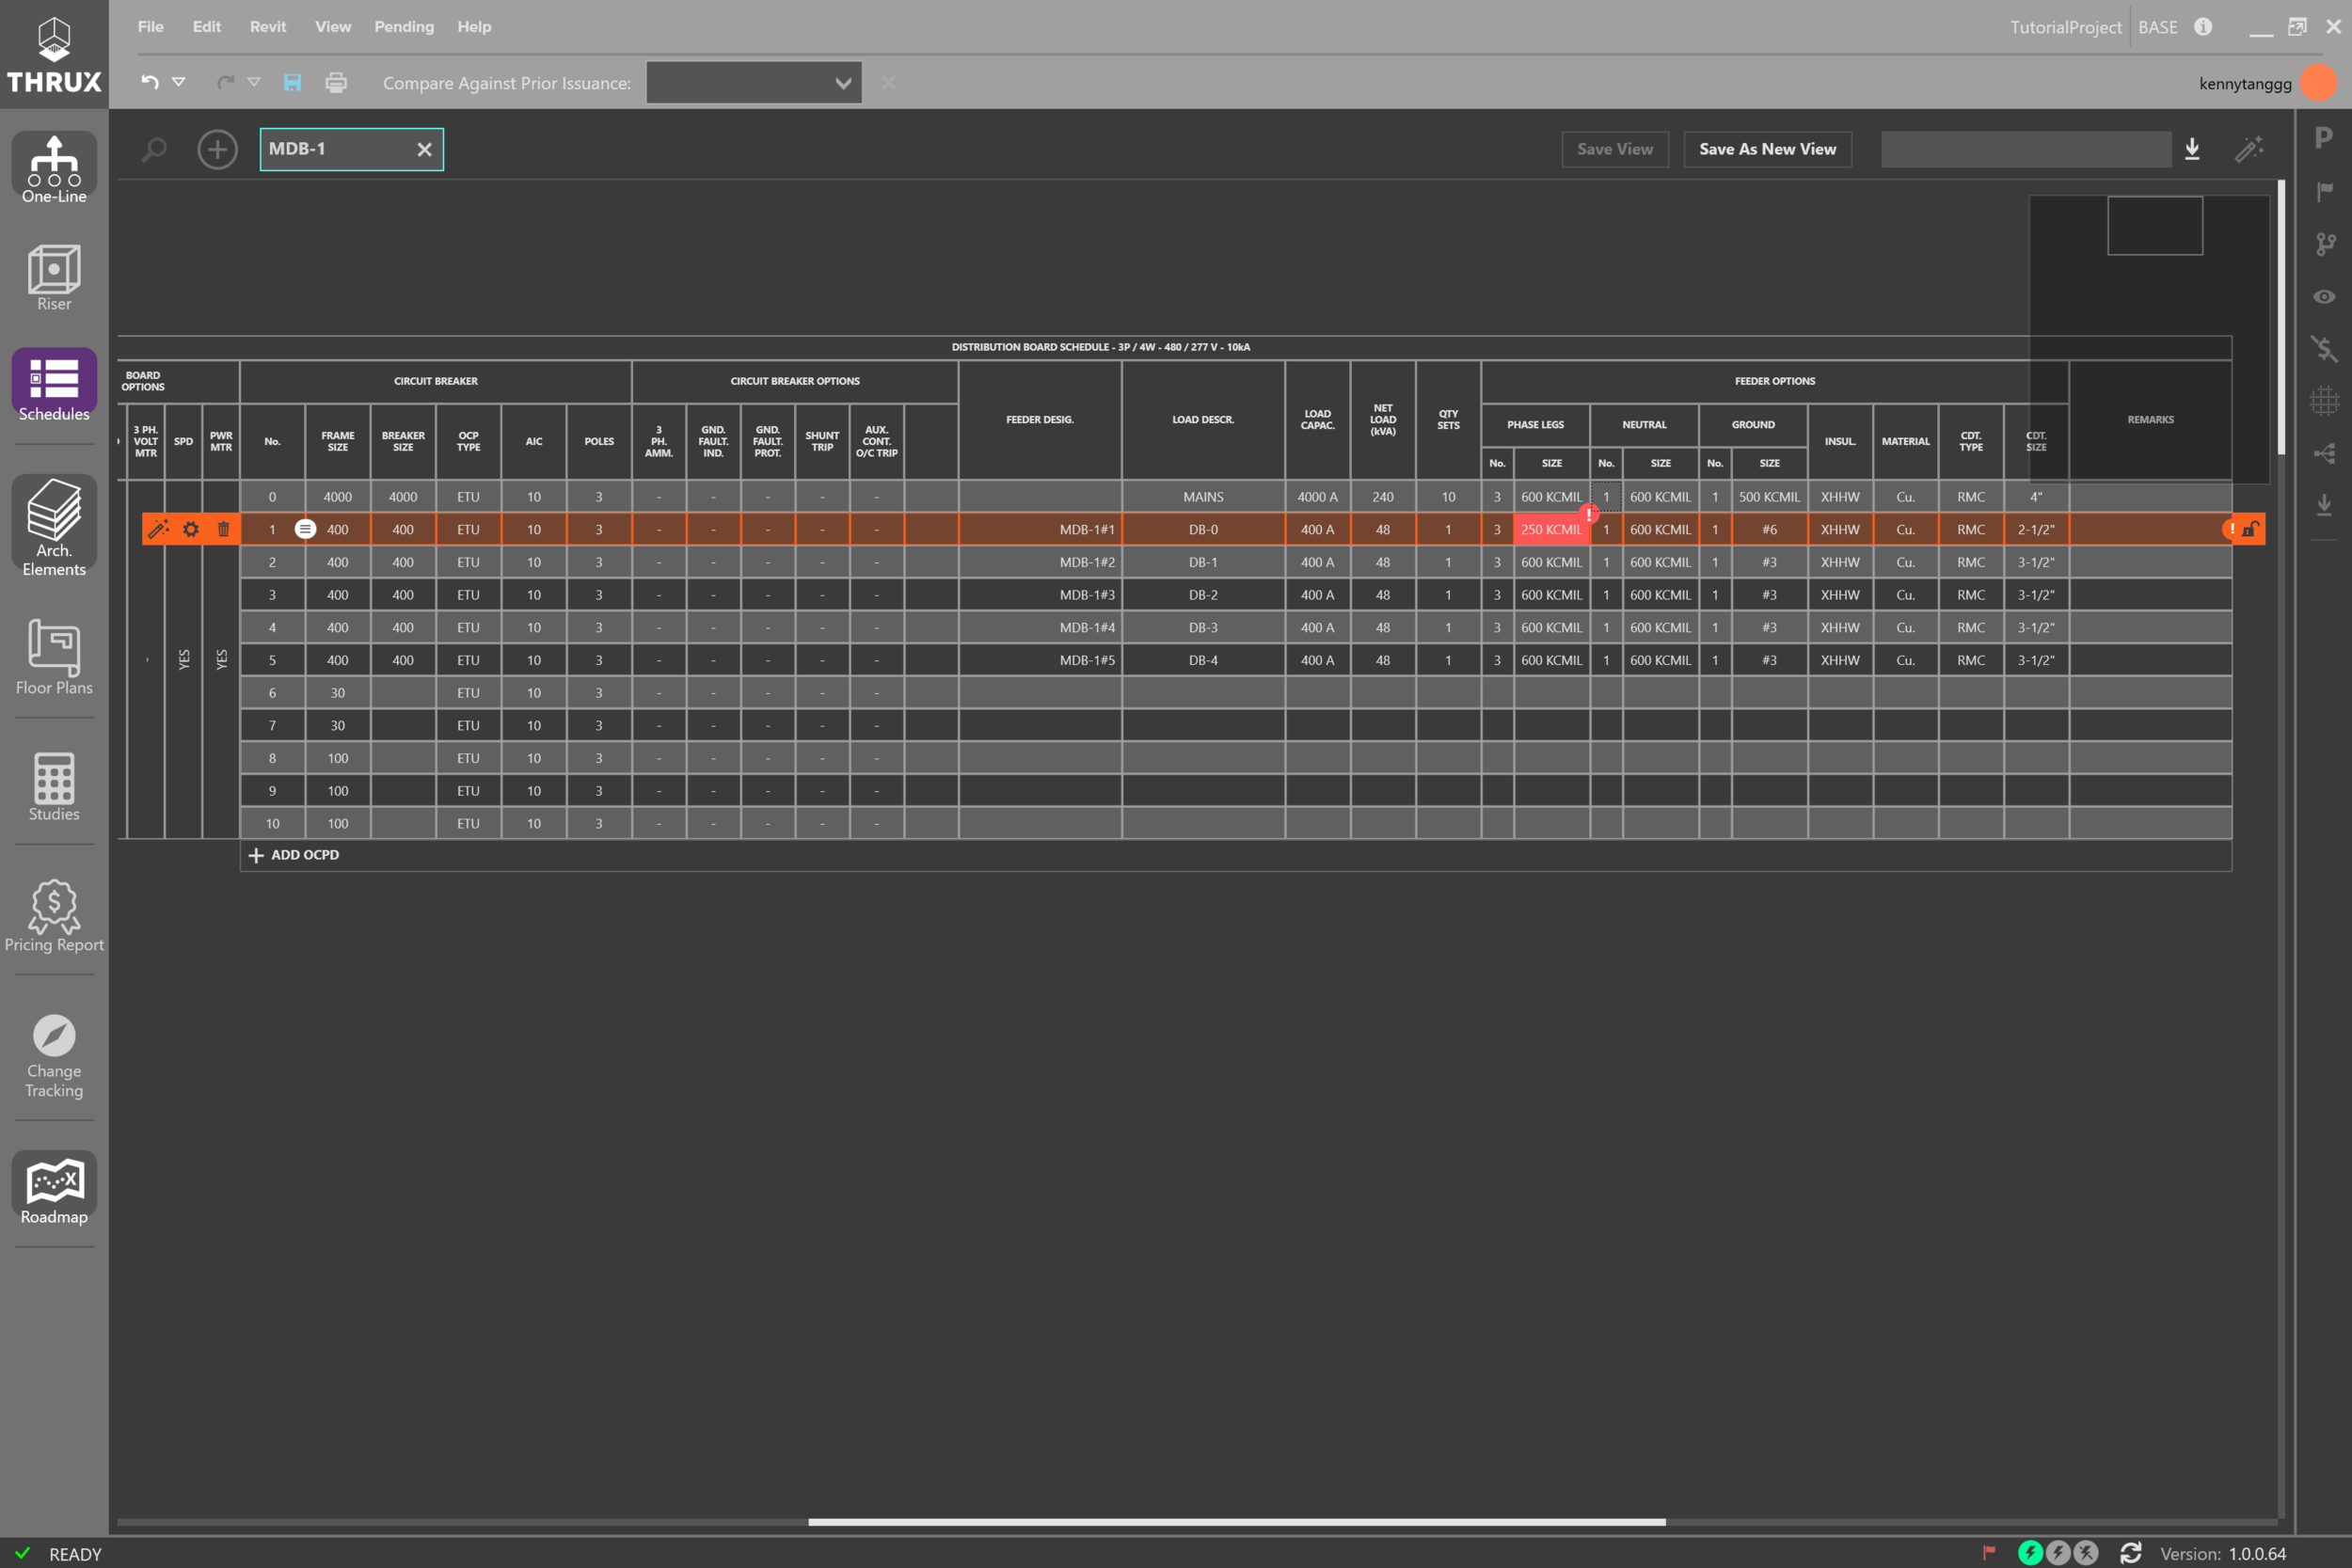
Design MEP Systems Faster

Learn how designers use the Equipment Sizing Engine to get out of Excel and increase their efficiency of building MEP systems.

Import an Architectural model from Revit into an environment designed with MEP engineering as the focus, modify MEP design to accommodate new layouts, then synchronize MEP changes back to a Revit model.

Or, mock up SD level layouts prior to receiving detailed Revit models.

Here, we’re integrating with Revit by using a simple add-in.

We’re abstracting away the heavy weight of Architectural tools into an environment with MEP design as the focus.

From here, we’ll import the model into THRUX, where we will be able to design a code-compliant system.

Well what can we do with this imported model?

Let's say we want to supply power for every room on the third floor.

Well we've already extracted all of the rooms from the Revit model.

Now we can filter them by floor, group them together, and create a load package.

This package is a bulk load and will be attached to the distribution board serving the third floor.

Now suppose the Architect or Owner would like to change the program by changing these rooms from Office to Retail.

From here, we can see a flag being raised, and it says that this board is undersized since the load has changed. Let's switch to our load flow view to get a better look at our system.

DB-3 is pretty undersized. So let's increase the capacity of this board from 225A to 600A. That doesn't seem to be enough so we're going to need to go with the next standard size up which is 800A.

Now our system is clear of flags, we have no code-violations, and we’re ready to submit our design.

Revit Interoperability

Sync up with Revit to ensure your design is based on the latest and greatest information.

Another design parameter to consider is voltage drop.

Let’s see how THRUX handles this by saying for whatever reason, our mechanical team adds a fairly large AC Unit on the 1st floor.

Let’s also say that the architect decides to change the height elevation of this floor to be something a little ridiculous like 1000 feet. Now we see another error message saying that voltage drop is an issue.

Let’s fix this by opening up the Voltage Drop QuickView, and changing the number of sets from 1 to 2, while still using 600s.

Our system is now clear of Flags, so we are code-compliant.

1. Now that we’ve finished our design and made sure that there are no code-violations, what's our next step?

We have to submit our design with AutoCAD.

So let’s open up this Schedule, click this down arrow, and click Export to AutoCAD. We’ll throw it on our desktop and call it MDB-1.

If we open up the file, now we’re ready to Print and PDF.

Integrate with AutoCAD

Don't worry about code-compliance issues, or losing your work when moving from Excel to AutoCAD.

Designers are often asked to design multiple schemes, but it can be difficult to track workflow with tools scattered from spreadsheets to AutoCAD drawings and Revit models.

Here, we’ll show you how easy it is to manage your schemes by using Branches.

Take a look at the Riser for the current system. Let’s say the client would like us to present an alternative design using Aluminum instead of Copper.

How do we handle something like this?

First, we’ll open up our Issuance Log, and create a Branch for our Aluminum scheme.

Next, we’ll open up the One-Line, and our Properties Menu. We’ll select all of the equipment in our design, and change the conductor material from Copper to Aluminum.

Now let's take a look at the Schedule of this board, and compare it to the previous Issuance. We can see that everything's been resized, and now we’re ready to export our model.

Flexible Designs

Test the limits of your designs with the ability to track history between Branches.

Here, we’ll monitor cost as we relocate a switchgear room across a floor, or move it to the roof.

Right now, we have a sample project open, and we'll take a quick look at the Riser.

We’ll open up our Floor Plans, and our Price Tracker.

Then we'll select Switchgear Room 1, and drag it across this floor.

On the right, we can see the cost, and for a more detailed view, we can look at the Pricing Report.

Next, we’ll open up our Riser, and drag our main distribution board from Floor 0 to the Roof.

And again on the right, we can see the impacts of our design in real time.

Cost-Conscious Design

Quickly provide order of magnitude estimates to better plan for future investments.